Misadventures in Bike Building
About two and a half years ago I bought a Soma Juice frame that was on a super sale. It had a chainstay break and I had some fantasy of an installing an internal gear hub and belt drive whenever I got the funds to do that. Fast-forward to September 2025 and I have finally defended my PhD thesis and had a bit of disposable income that I could spend on buying the parts I need for this bike. I decided that rather than go for the belt drive and internal gear hub, I would do a dingle-speed[1] with a chain. The thought behind this was that it would be easier and cheaper to acquire and assemble the parts. This was mostly true, but I still spent about 1,000 CAD on a wheelset, chainrings, cranks, bottom bracket, brakes, tires, and a fork. The lesson here is the same one anyone will tell you: building a bike from parts is more expensive than buying stock.
So I finally had the parts together, but I would need to take some components from my old bike and had to wait until I had time to put it all together since my bike is the main way I get around the city. Unfortunately, this time did not arise until halfway through December and I spent about a week using my spare time to build up my new frame.
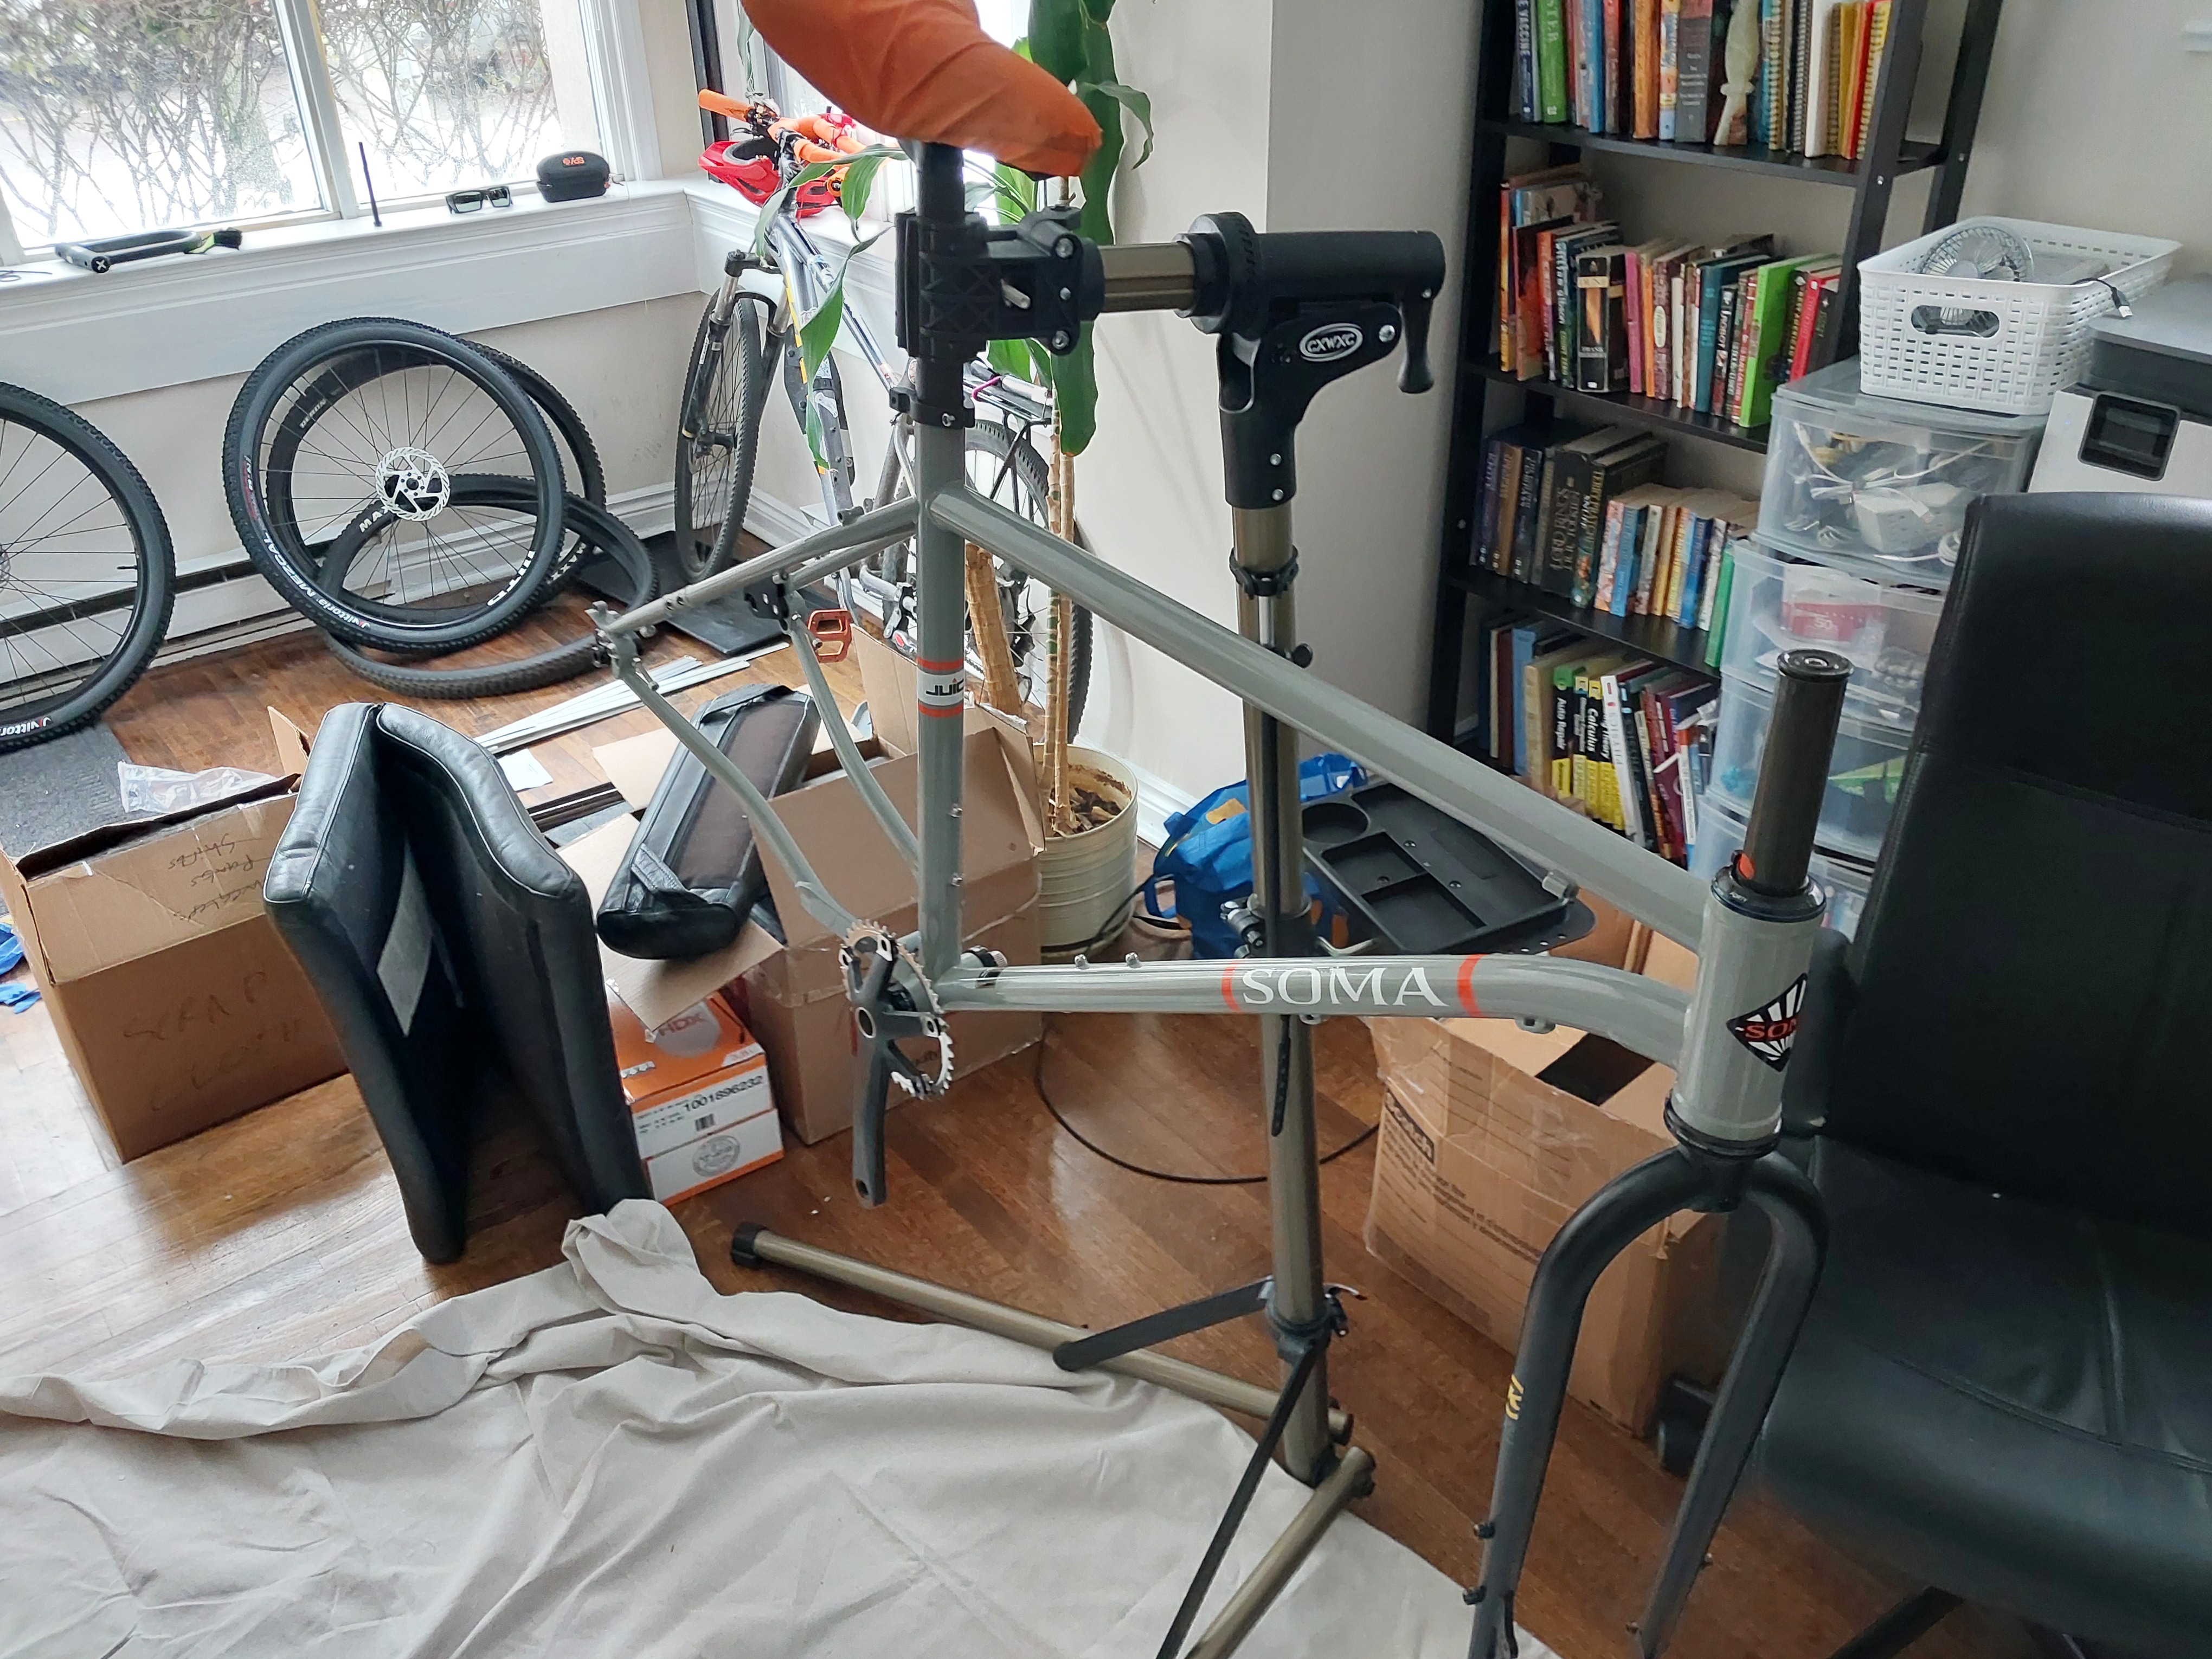
I already had my fork cut and installed onto my frame by the bike shop, so I didn't have to putz around with that. I moved my old seat and seatpost onto the new frame and mounted it on my repair stand. I then went to isntall the bottom bracket, cranks and chainrings. This is where my first mistake became obvious. The initial gearing I had set up was 42t and 46t at the front and 20t and 16t at the back. I had these chainrings installed on a five-arm 110 BCD crank and figured everything would work out. I installed the crank arm and lo and behold: I did not consider the clearance on the chainstay, my lower gear had less than a mm of clearance. It could theoretically go, but that was way too close for comfort for me, and pushing the crank into the bottom bracket already caused the chain ring to dent the paint on the chainstay. This was, needless to say, very frustrating.
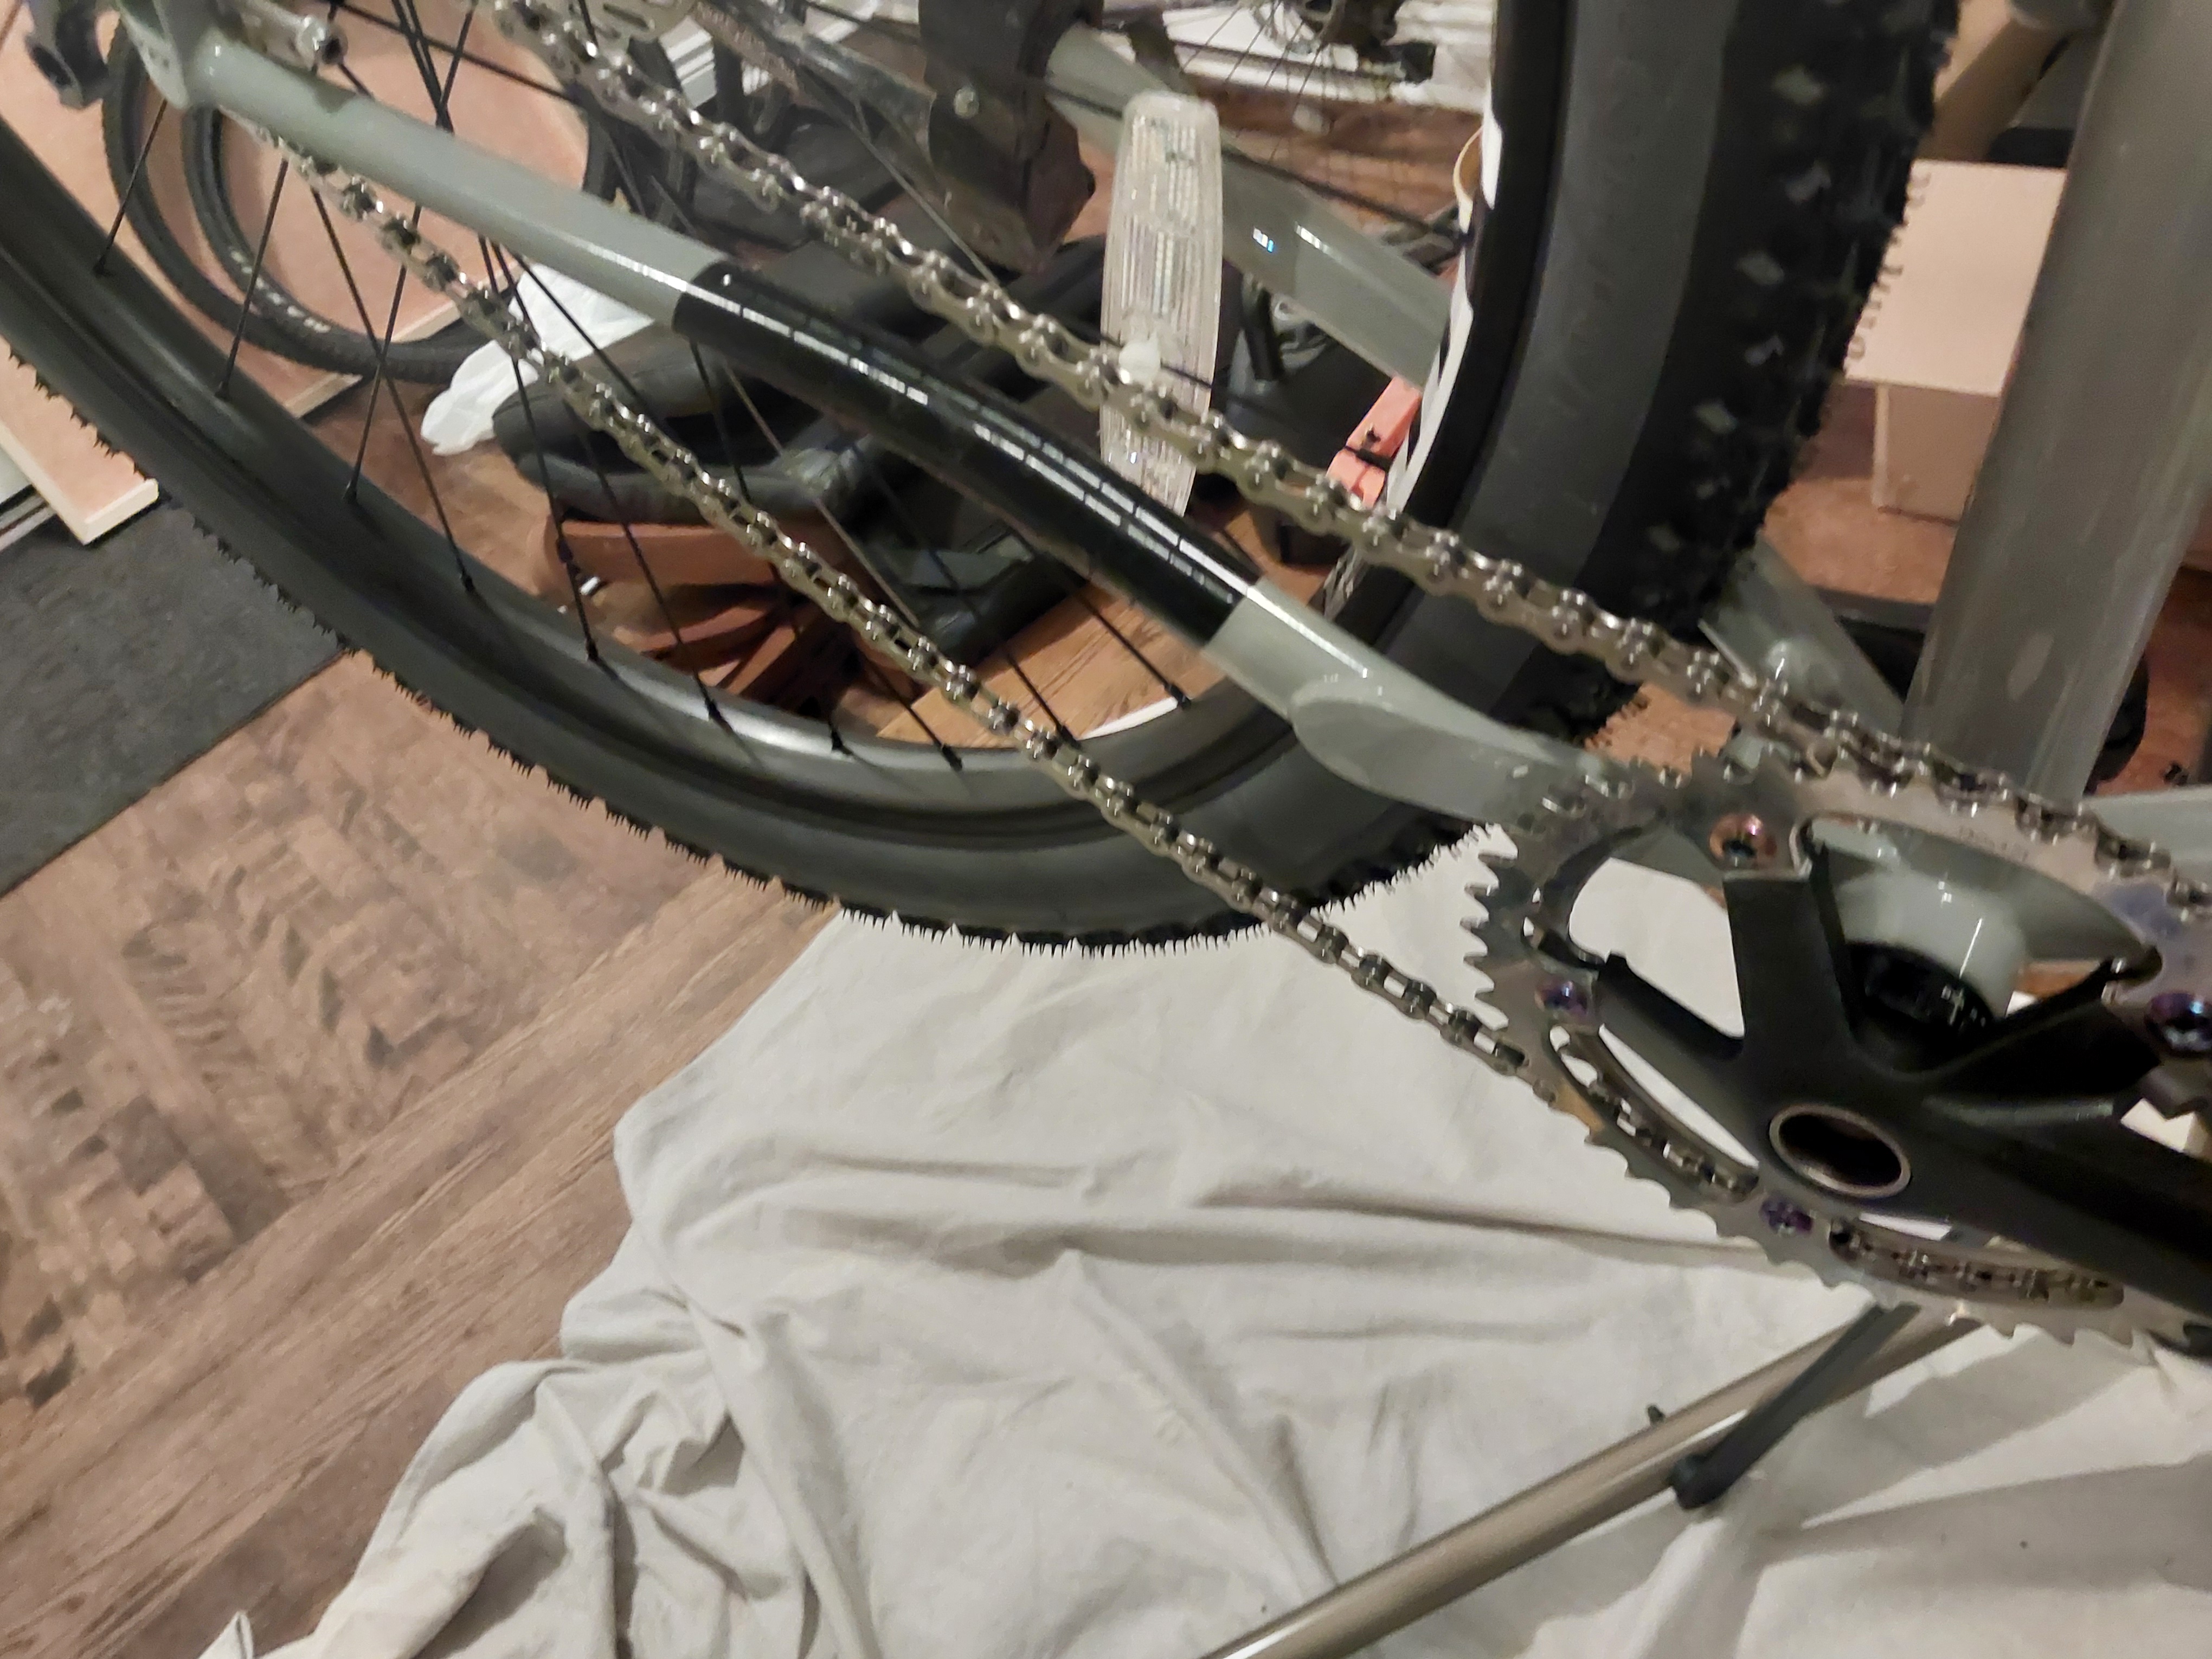
So I went off and purchased a 38t chainring, which is pretty much the smallest possible size that will fit on a 5-arm BCD spider, moved the 42t to the outer gear and prayed that it would all fit together. Before installing the new chainring, I did my best to measure the clearance between the chainstay.
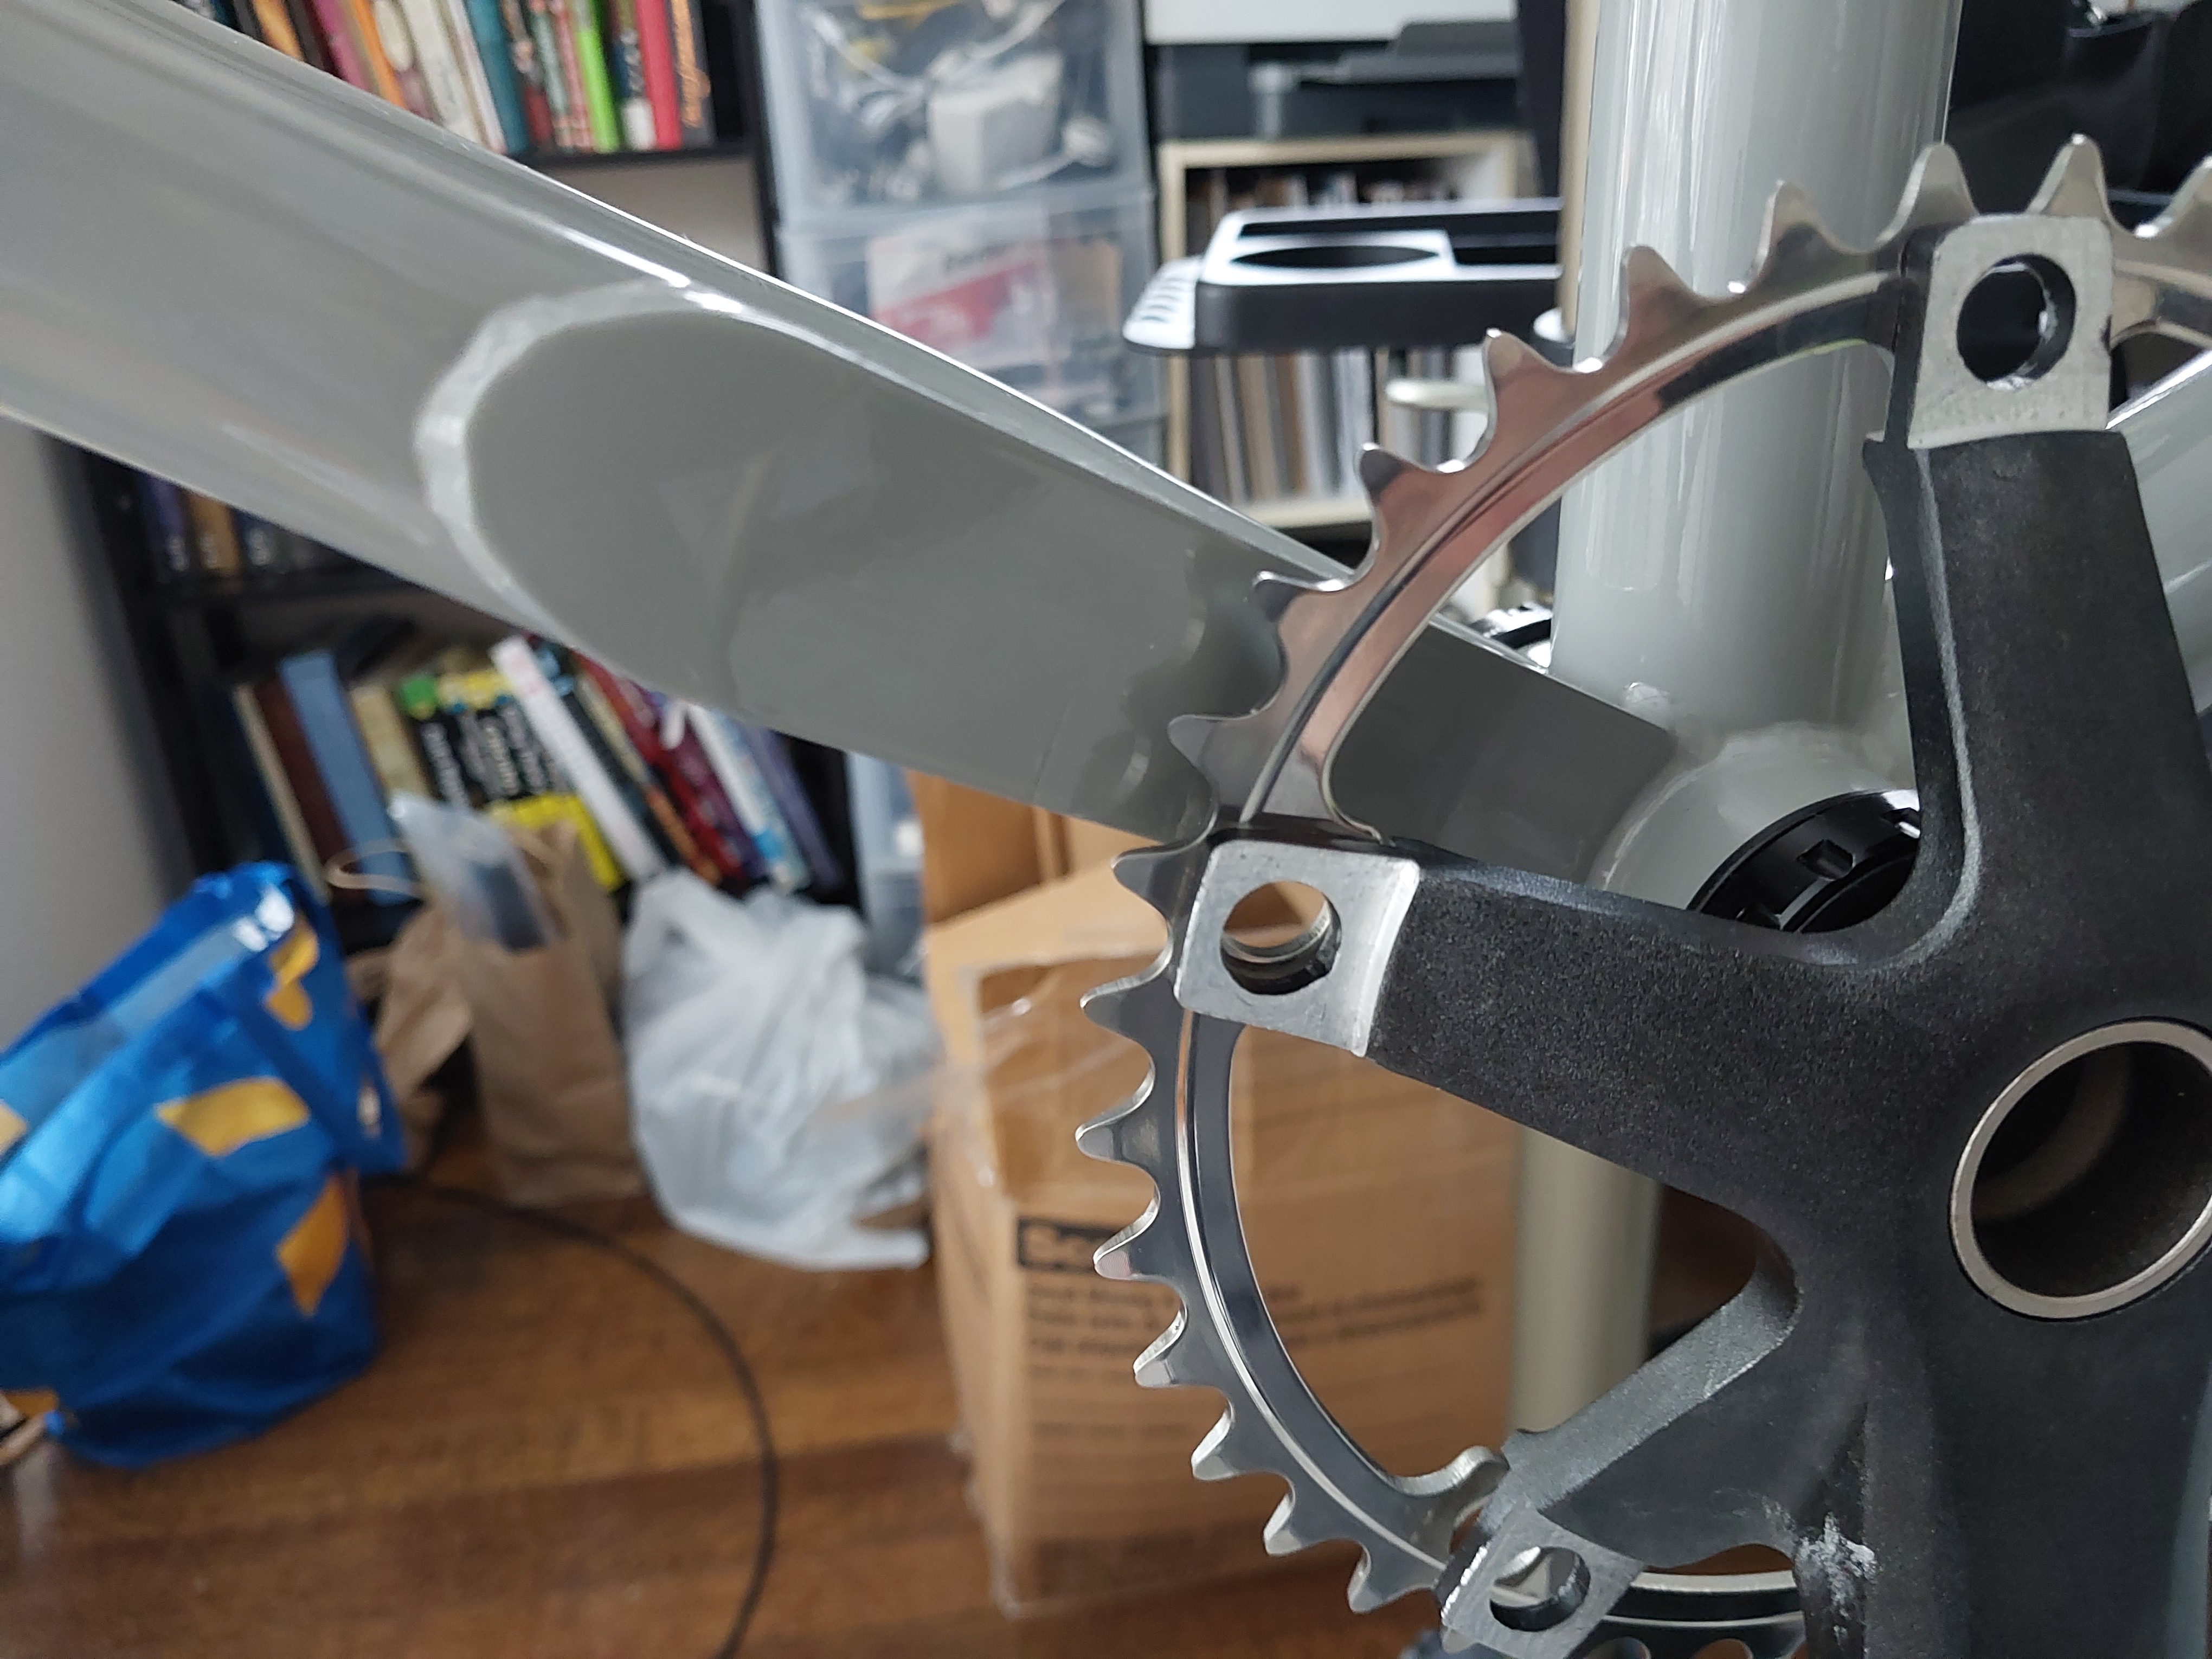

You might be able to see the dent in the paint from my first attempt in this last image. In my second attempt, the clearance was about 4 mm, which is plenty for me so I installed it and double checked that it would work.
![]()
Plenty of space to work with, so no worries. Next it was time to put on the other crank arm, where I encounted the next issue.
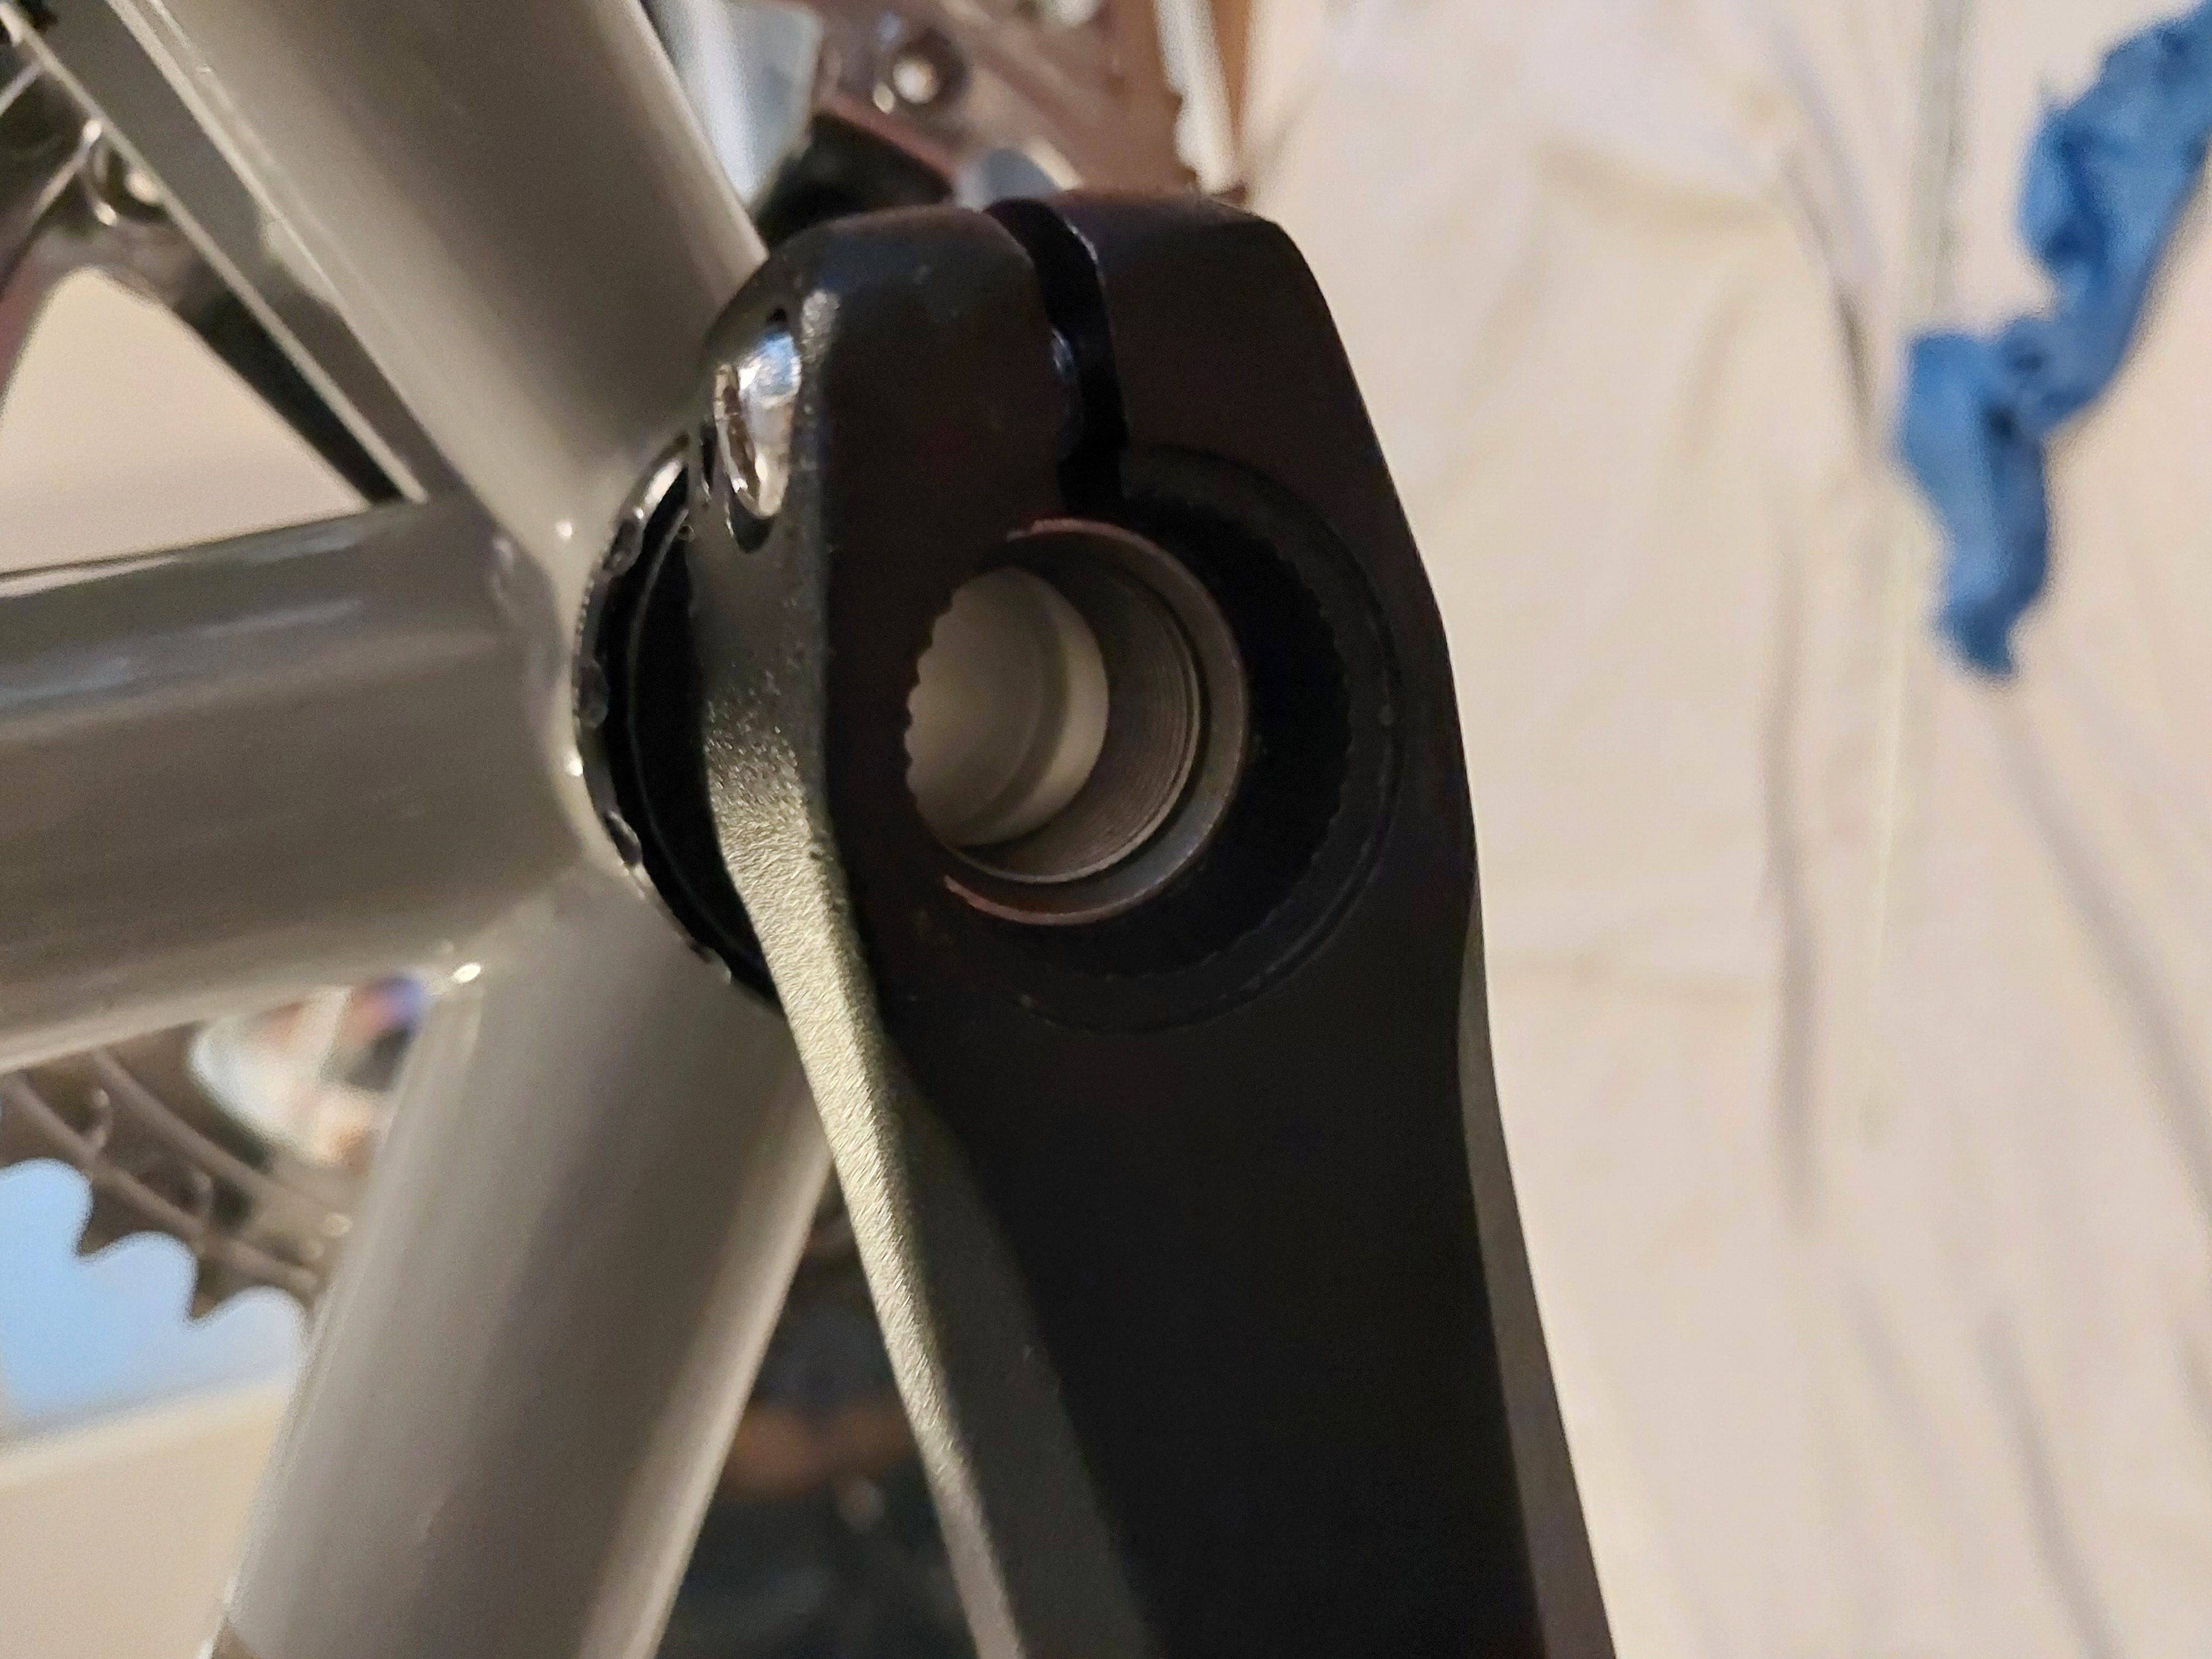
The issue here now is that the spindle didn't extend far enough out the other side of the bottom bracket, and the crank arm could not be completely fastened on. The bolts that I did tighten seemed solid enough though, and I figured I'd just try it out and see if it worked.
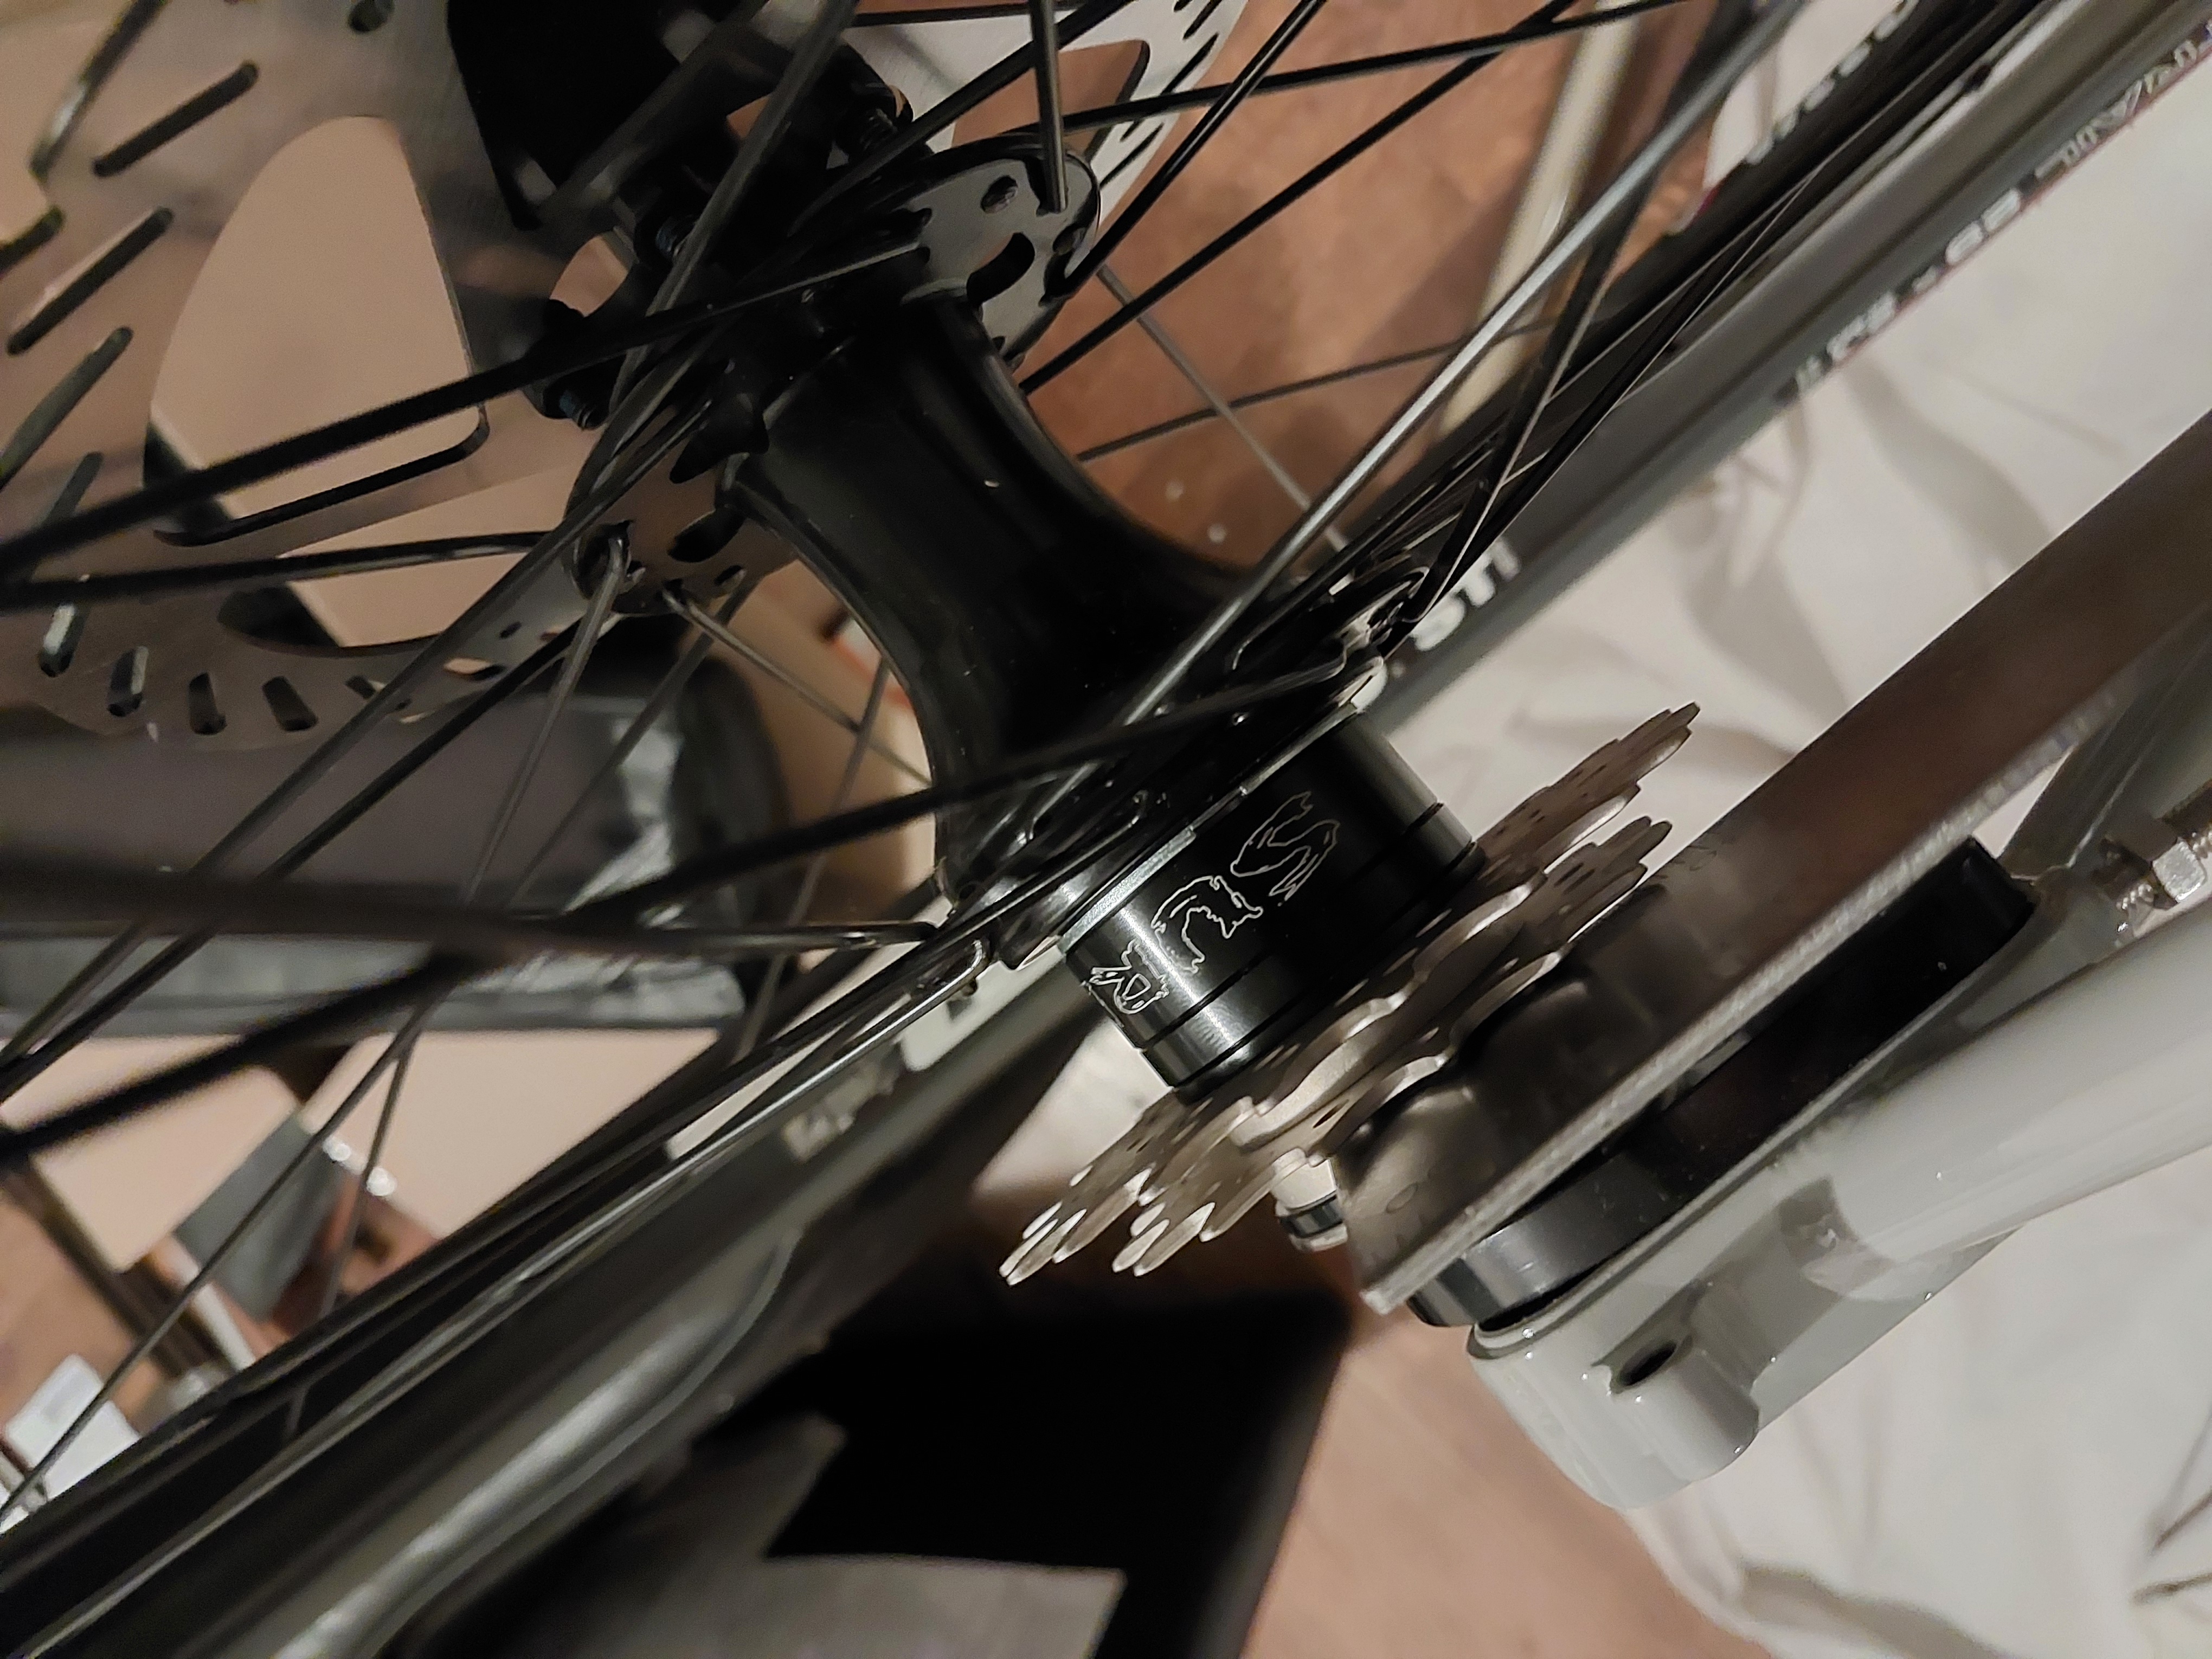
Once that was done, I spent time trying to get the chainline right on my rear wheel using a metal meter stick as a straight edge to line it up.
After that time-consuming task, I threw on my old handlebars. These are the Surly Moloko bars, and I am a huge fan of them, nice wide grip with multiple different hand positions available for when you want to change it up.

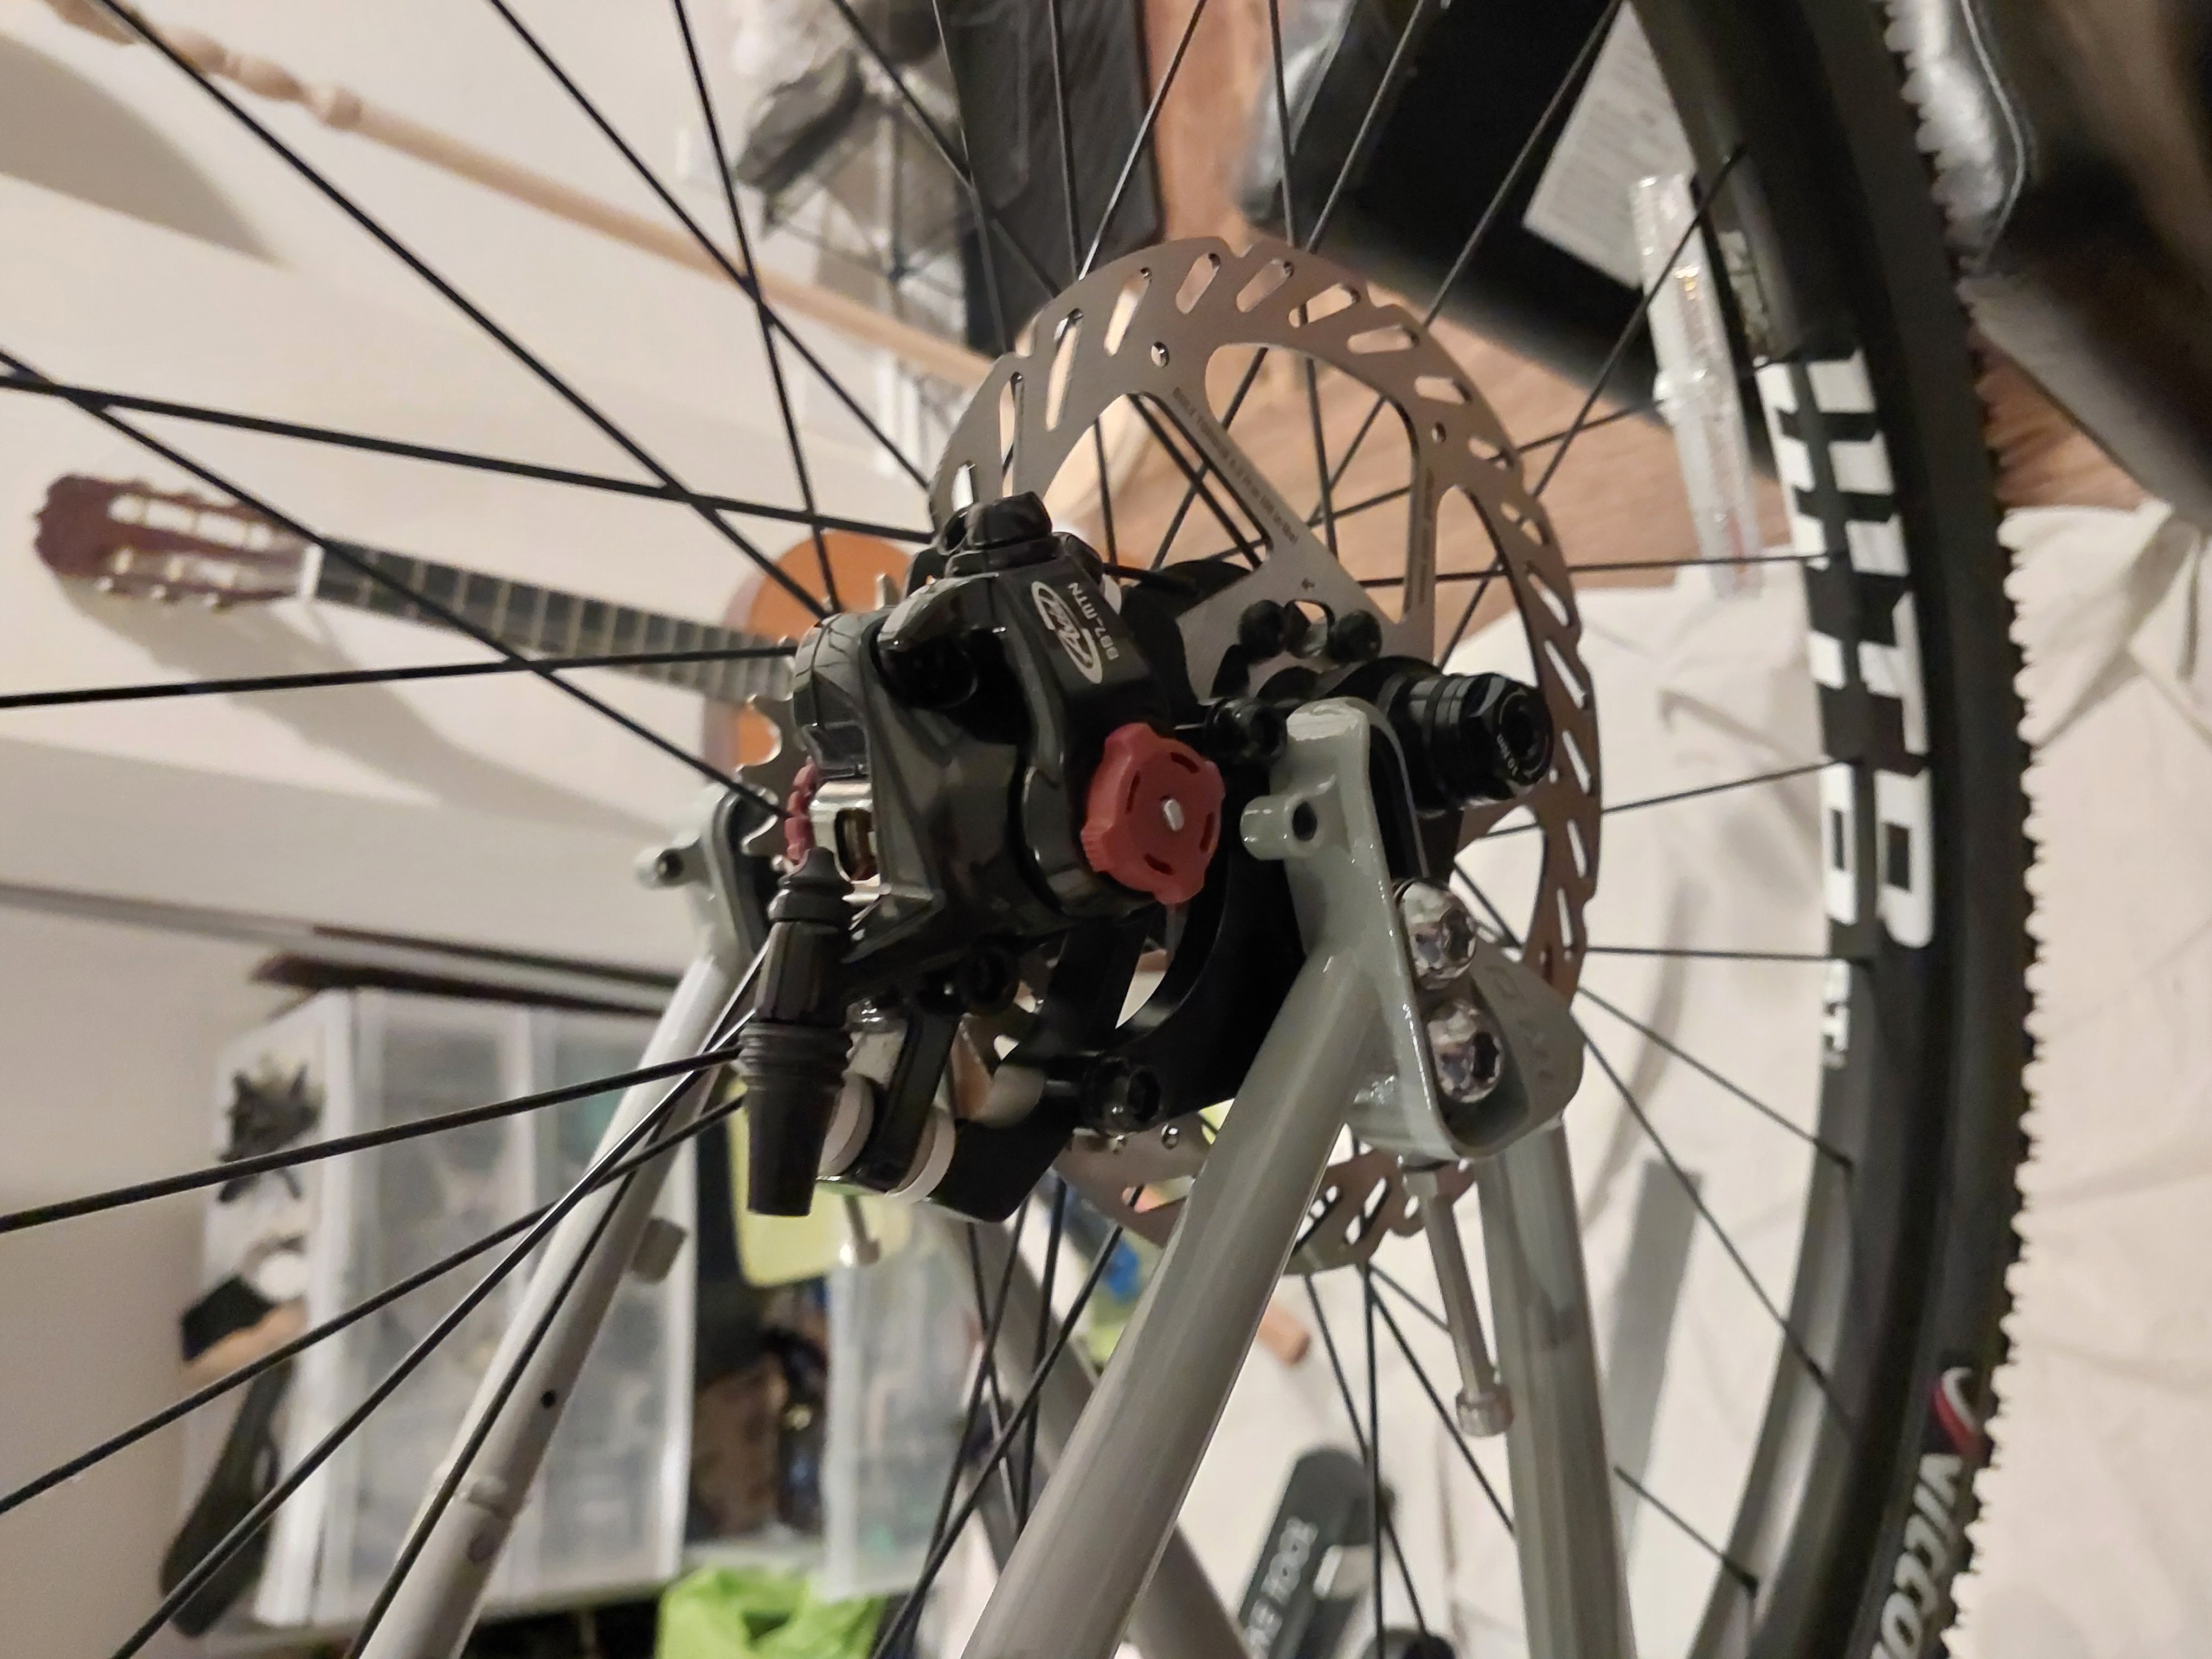
Then I installed the disk brakes. I went with cable-actuated brakes instead of hydraulic brakes like my previous bike. I made this choice because I really didn't like how hydraulic disk brakes were maintained, and they cable-actuated ones seemed sufficient for the type of riding I do. Plus these were easier to install.
Next I put on new handlebar grips (still orange), which got stuck partway on and were a real pain in the ass to finish installing.

Once that was all set up and I finished installing the brake cables, I moved my pedals over from my old bike, and finally put the chain on.
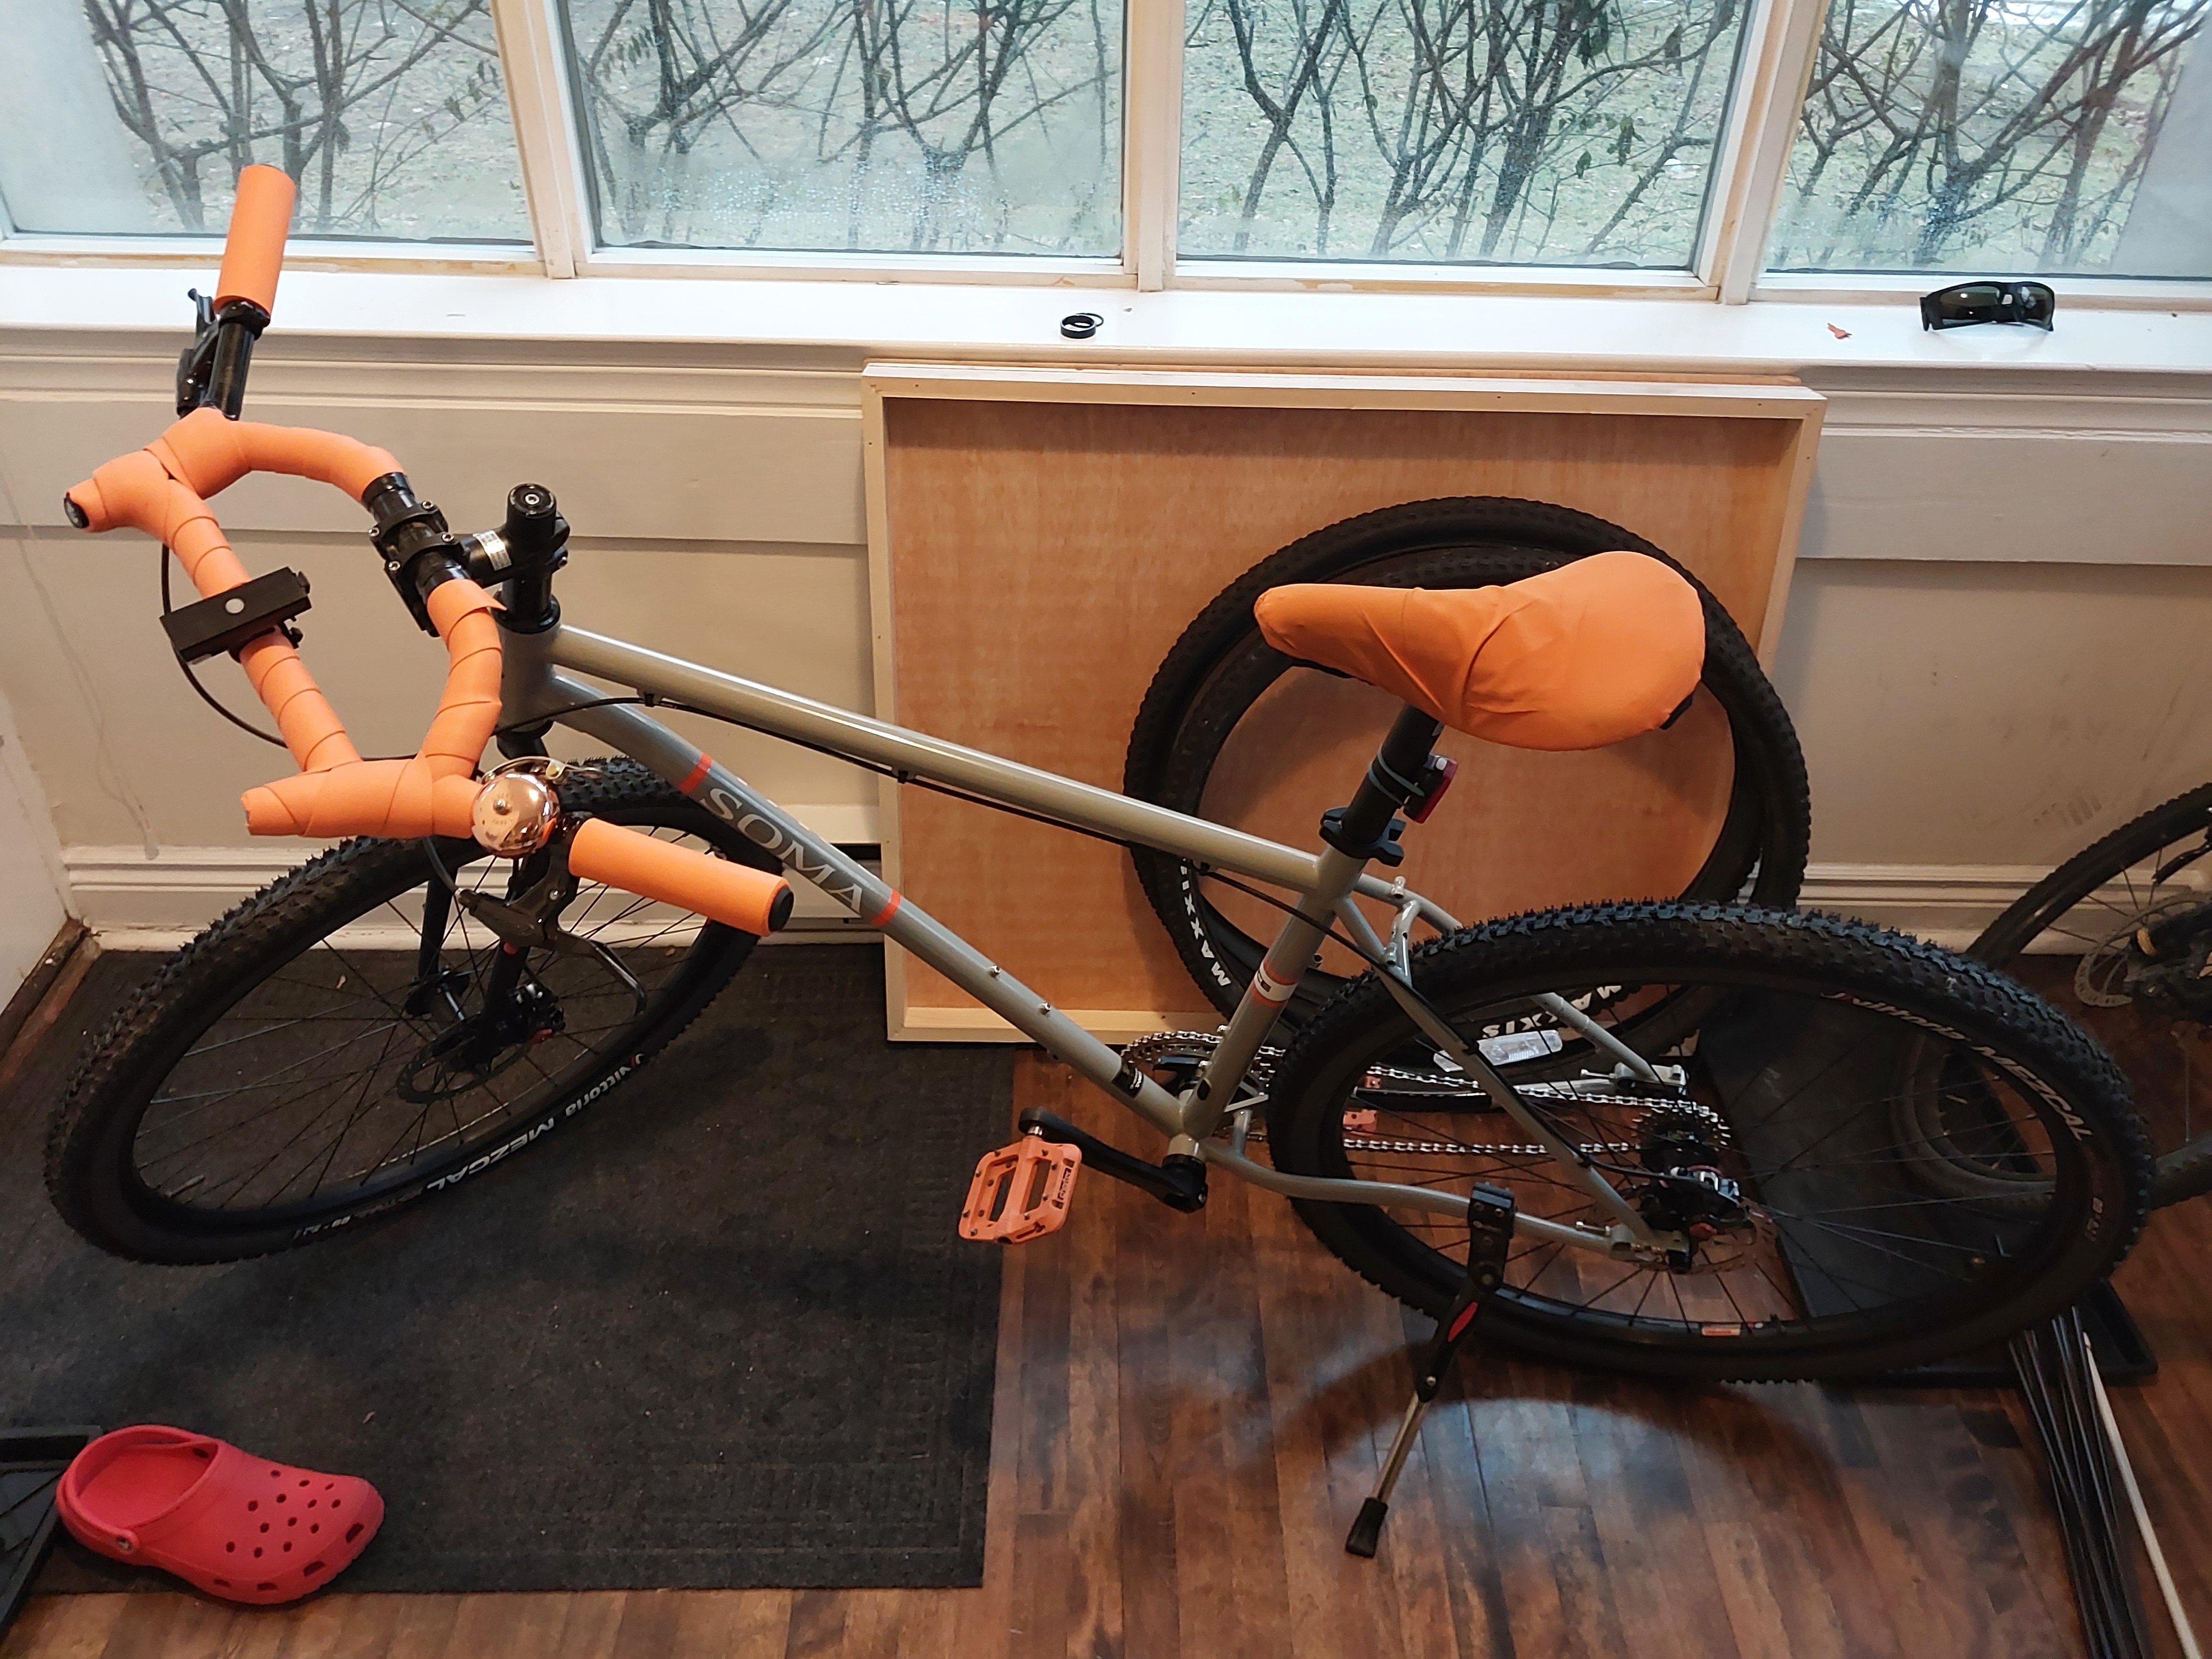
And with that, the bike was complete enough to take for a test-ride.
It was a lot of fun to ride. The brakes needed a little fiddling, but they were otherwise very responsive and effective, and honestly felt better than my hydraulic disk brakes (that I've neglected bleeding for several years). Unfortunately, it did not take long for an earlier mistake to come back and bite me in the ass.
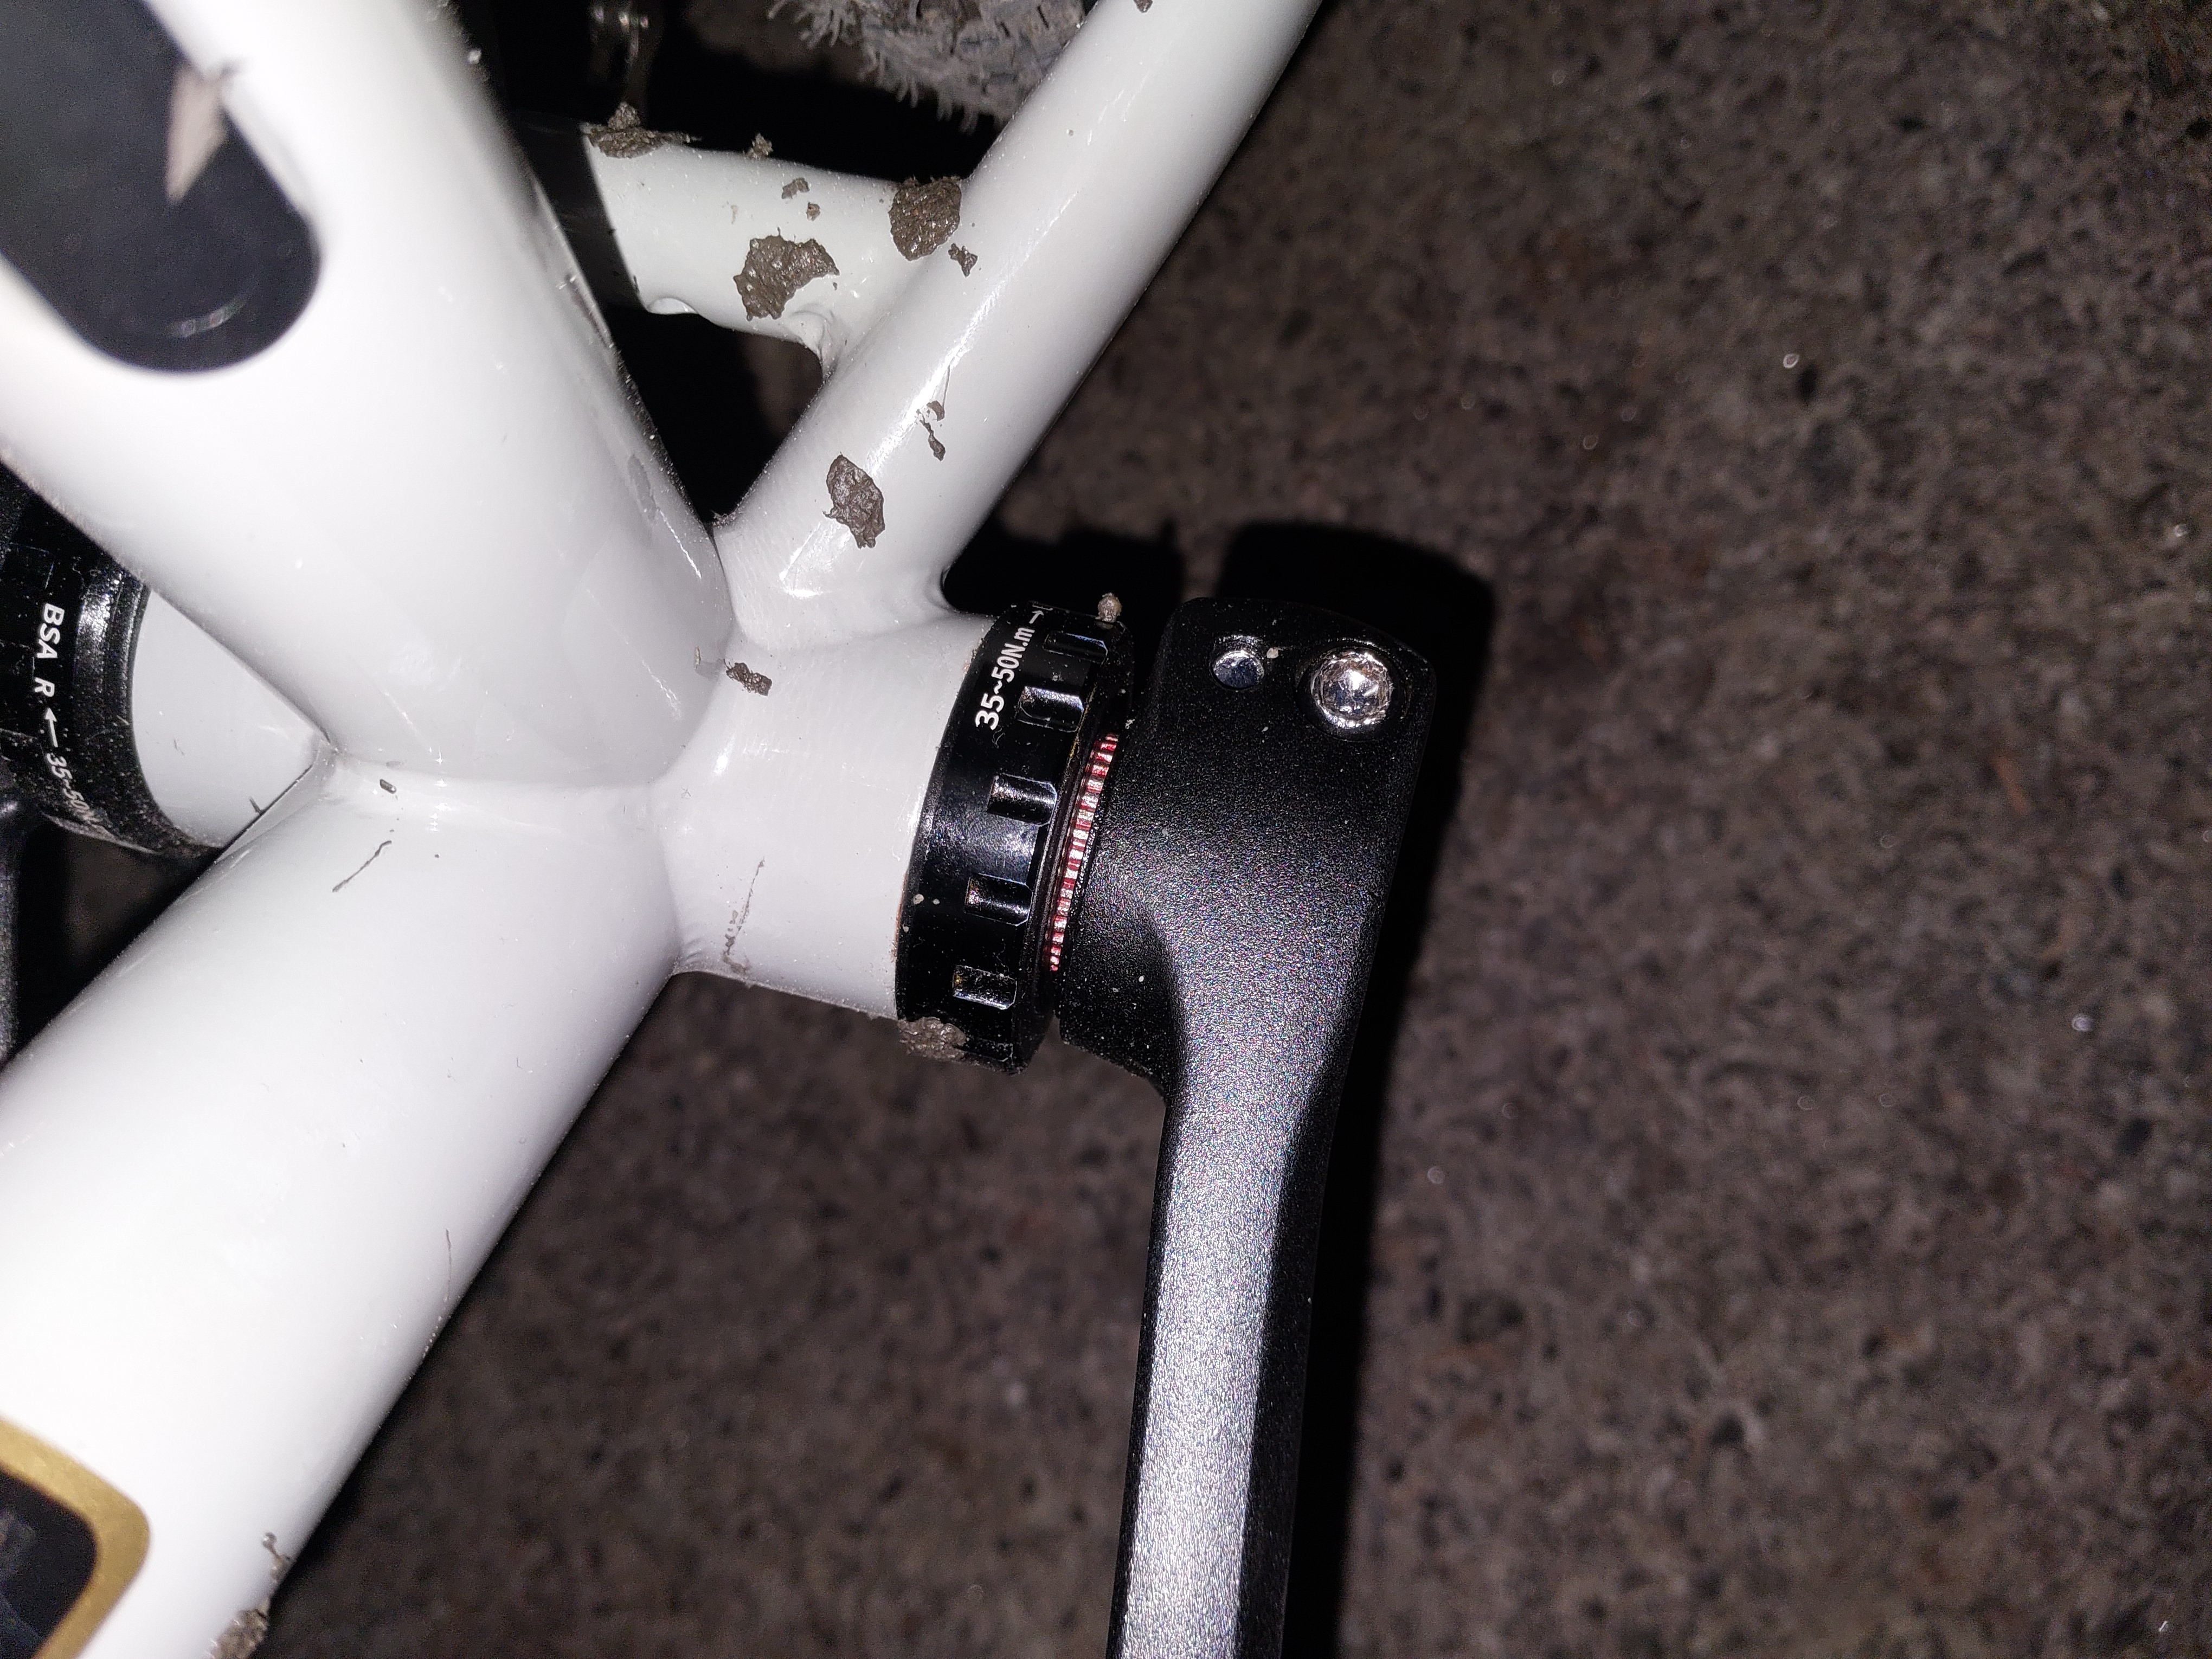
The non-driveside crank arm started to come off. I tried to really tighten it on the first time, but it started slipping off again. This was honestly heart-breaking because it meant that I would need to purchase new crank arms and likely chainrings too, and it was nearly christmas by then so anything I ordered online would take some time to get here.
This is unfortunately what I ended up doing, and I am praying that I ordered parts that will actually work properly with my frame. I am still waiting for these parts to come in, and I have been bike-less for the past few weeks. It sucks, but I am excited for these parts to come in and to finally get back on my bicycle.
Until then, I suffer the TTC.
| [1] | Two gears in the front and two in the back with the same size difference between each pair. The chain has to be moved over manually when you feel you want a change of pace. |